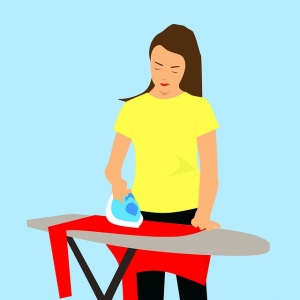
Do You Know …
How To Do It Right?
How to iron shirts the best and most efficient way?
“Clothes make people” and despite the fact that modern non-iron shirts look neat and well, many men in professional life or even on solemn occasions do not come without smooth-ironed business shirts. Thus, now and again shirts ironing is announced!
But how do you iron a shirt?
Not all shirts can be washed and ironed at the same heat. For example, shirts made of cotton tolerate a higher washing and ironing temperature than shirts made of a blended fabric, synthetic fibers, viscose or silk. The washing and care instructions including ironing temperature for each shirt can be found in the sewn-in laundry label!
Even if it is allowed according to the sewn-in laundry label under no circumstances start to iron at a hot temperature. If you iron shirts too hot, the fabric may not survive this and the shirt cannot be worn anylonger. If you are unsure about the correct ironing temperature, you should always first iron the shirt with a lower temperature, and if the fabric does not straighten, gradually increase the temperature of the iron gradually.
So that your blouses and shirts are not so crumpled on the ironing board and can be ironed as easily as possible, you should already consider some aspects when washing and drying. Among other things helps against creases, if the washing machine is not totally stuffed and blouses and shirts are washed separately and hung to dry on a hanger, not to mention that there has to be also good equipment around. You cannot win the battle if your iron belongs to the rubbish bin. This should be replaced immediately by a perfect weapon, such as the Rowenta DG8520 Perfect Steam 1800-Watt Eco Energy Steam Iron Station.
Ironing shirts works best …
Either iron your shirts as long as they are still slightly damp or moisten them slightly with distilled water in a spray bottle before ironing. This makes the shirt folds a lot easier to get smooth. Of course, a steam iron is ideal for ironing shirts.
After you have prepared the ironing board, switched on the iron and set the appropriate ironing temperature you can start:
Getting Started – The collar
For this you should put the open shirt on the ironing board so that the inside of the collar is on the board. Then hold with one hand the collar at the top, with the other hand iron the collar from outside to inside, in each case to the middle. Then turn the collar over and iron on the outside.
Second – Sleeves and cuffs
The best way to iron sleeves and cuffs on shirts is to put the shirt on the ironing board so that the left sleeve goes to the right. Then align the sleeve after the seam, straighten it out and stretch it so that the fabric lies as smooth as possible. Now iron the cuff first with the tip of the iron from the inside, then from the outside. When doing so, pull the fabric tightly so that it does not cause unnecessary wrinkles when changing from the cuff to the arm. Then hold the sleeve adjacent the shoulder seam and gently iron off the cuffs and sleeve inseam toward the shoulder area. Then turn the shirt over, align the sleeve again after the seam and iron from the other side. When one sleeve is done, the other one comes.
Next step – The button placket
When the collar and sleeves are ironed, turn the shirt to the left and iron the button placket from the inside. This is usually sufficient and is much easier than ironing the fabric on the outside between each button. In addition, buttons are often very sensitive and could also be deformed by the heat of the iron. With thicker shirt fabrics, however, you may still need to smooth the fabric between the individual buttons with the tip of the iron.
Then – The shoulder
The shoulder part is relatively easy to iron. Lay the shirt with the inside to the board over the top of the ironing board. Then pull the fabric smooth and iron gently over it bit by bit, down to the collar. If both shoulder areas are ironed, you can continue with the large parts, such as the front and back of the shirt.
Last – Front and back
You should start with the front on which the buttonholes are attached. Then iron the shirt from there over the back to the second half of the front. Keep pulling the fabric taut, so that the shirt is really wrinkle-free at the end. Are shirts provided with a breast pocket, these always in advance from the outside to the middle ironing out.
So in just 5 Steps you are done and the result is a perfect ironed shirt!
What ironing is still to pay attention!
– for a shirt with darts at the back, as a precaution, iron out smaller and smaller areas and always pull the fabric back to avoid wrinkles.
– print-on shirts should be ironed from the left. Otherwise it can happen that pictures or inscriptions get stuck on the hot outsole of the iron. Thus, the shirt would be ruined and also a cleaning of the iron required.
– in the unlikely event that a crease has formed during shirt ironing, you can sprinkle this area again with some distilled water and iron it a second time.
– when all wrinkles have been removed, you can close the buttons, fold the shirt, or hang it on a hanger.
In any case, you should allow your shirts to dry properly before you put them in the closet. Otherwise it could possibly lead to foxing.
Of course, ironing is not easy for beginners, but once you know how to do it right, this too will turn into routine household chores.